Mac OSX Lion Secure Backup to Time Capsule with size limit
💻Computers
Update: On August 31 I updated this post with a more detailed description that should always work
I was among the 1M people who downloaded the newest version of Mac OSX operating system 10.7 “Lion” in the first 24 hours but to make sure my productivity doesn’t suffer I initially installed it on my wife’s personal Mac. She doesn’t use it so much these days anyway. After some trying out I finally installed Lion on my Mac this past weekend. With two Macs on Lion I found a cool way of keeping all our backups on a single Time Capsule drive. Here’s how I did it.
**Note: This is a technical post for Mac OSX Lion users. **I wrote it because I didn’t find a single easy-to-digest how-to for configuring secure Time Machine backups on Lion. Sorry for this technical stuff, I just hope it’s useful for some :-)

My setup: 2 Macbook Airs and one Time Capsule
So we have 2 Macbook Airs at home - one belongs to my wife and one to me. We want to be able to:
1) Backup both Airs wirelessly to the same Time Capsule
2) Make sure we have enough space on the Time Capsule drive for our backups and also some other media files
3) Make the backups encrypted for maximum safety
New Lion’s Time Machine is good and secure… but needs tweaking.
The new Time Machine in Lion can encrypt your backup drive, but only if it’s connected via USB. If it’s a Time Capsule, no dice. Second thing, the Time Machine backs up until the disk is full. If we have two Macs we want to make sure we have space for each other’s backups and we have room for some media files. For that we need to create “virtual, encrypted backup hard disks called sparse bundles” on the Time Capsule for each of our Macs. Here’s what I did:
Step 1. Enable FileVault2 on the Mac
I was using FileVault on the Mac so after I upgraded to Lion, I went to “System Preferences” and had to first disable what Apple now calls “Legacy FileVault” and decrypt my user account. It takes a few minutes, once done I went ahead and enabled the new FileVault on the entire hard disk. Again, took some time to complete. Now my entire disk on the Mac is encrypted.
Step 2. Prepare Encrypted backup disk (a.k.a. “Sparsebundle”)
I found this hint here - now let me upgrade it to the Lion. Just do the following:
- Figure out the name of your computer (and make sure it doesn’t contain spaces).
This is important. Go to “Sharing” in “System Preferences” and rename your computer (mine is called “Jane”, don’t ask&)

Also find out the address of your main ethernet card (in the case of my Macbook Air it’s the address of my wireless card) - go to “System Preferences”, “Network” and click on your wireless card and go to “Advanced” and at the bottom of the page you’ll see your “Wi-fi address”& or just type in the Terminal:
| _ifconfig en0 | grep ether_ |
The result for me was: 04:0c:ce:dc:a6:78
Keep this address for later.
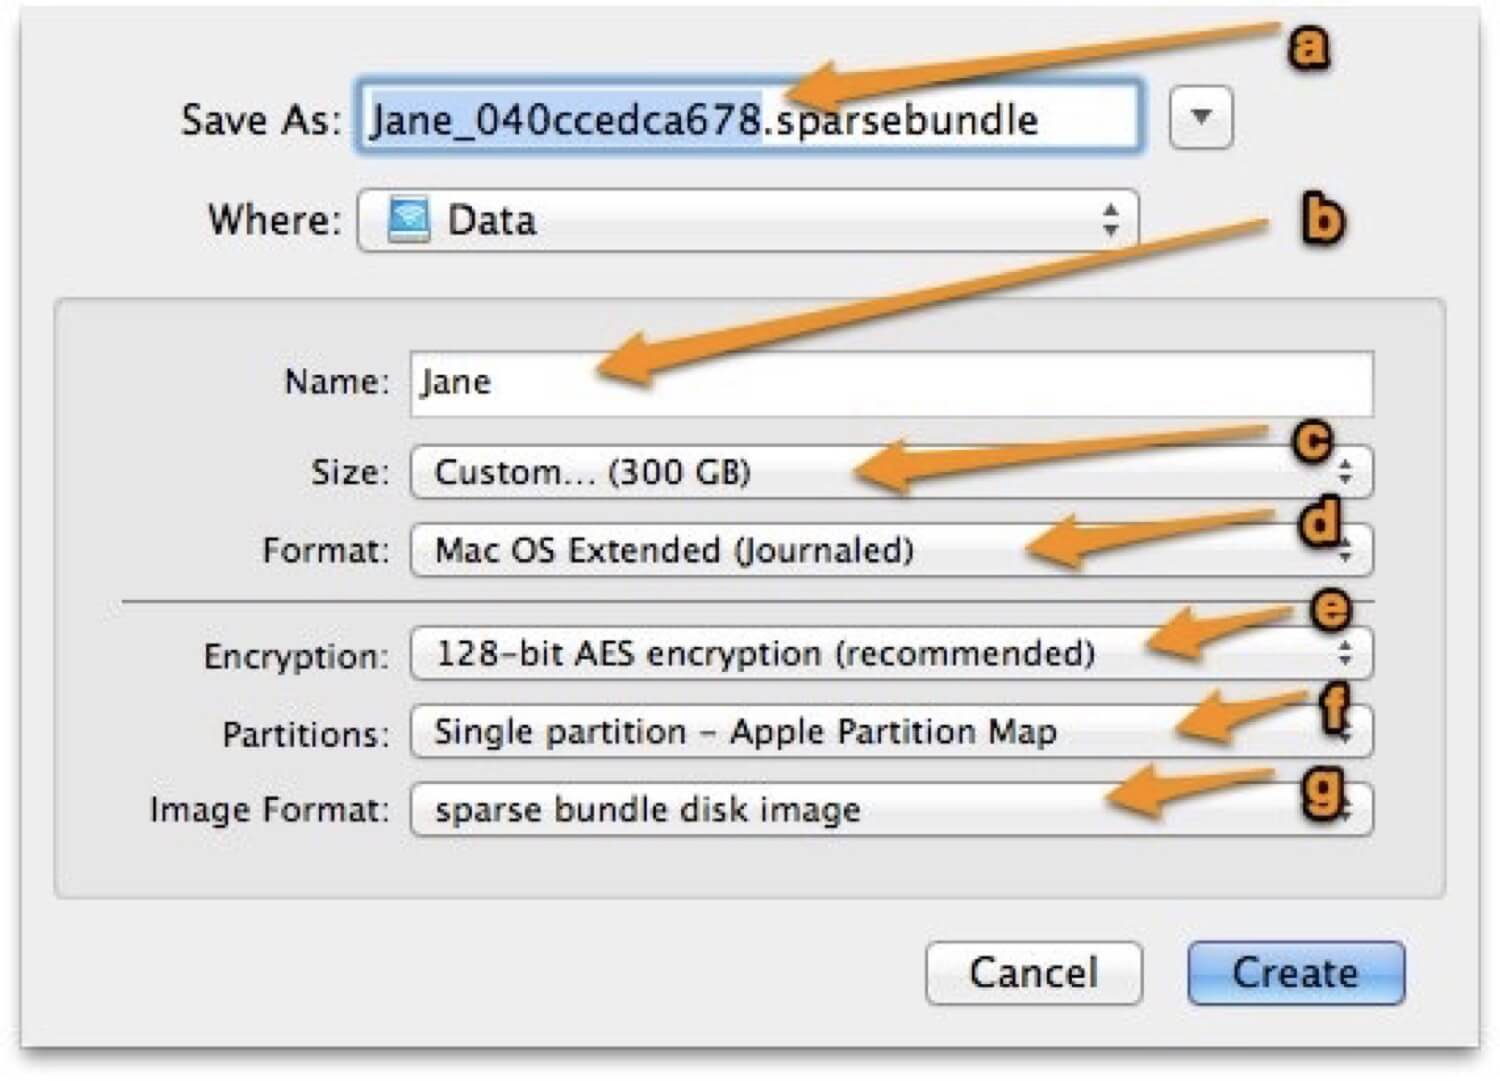
- Open disk utility and create a new volume image on your Time Capsule drive like this:

a) Save As: ComputerName_EthernetAddress (without “:”)
In my case: Jane_040ccedca678
(Computer name: Jane, Ethernet address without “:” is: 040ccedca678 - make sure to find out yours in the previous step)
b) Name: ComputerName (in my case: Jane)
c) Custom size, I chose 300 GB for now.
d) Format leave as it is, meaning: Mac OSX Extended (Journaled)
e) Encryption: choose 128-bit - it’s fast and it’s really secure
f) Partitions leave as it is, meaning: Single Partition, Apple Partition Map
g) Choose “sparse bundle disk image” - important.
The cool thing is that the virtual disk will be small at the beginning and will only reach it’s size after many backups. I don’t store too much media on my Air, so 300GB should be good for now. Initial backup was just 115GB. Plenty of room for the incremental backups now.
Size of the Sparsebundle file/disk can be increased later with one terminal command if you need that :-)
This way on our 1TB Time Capsule we have 600GB for backups and 400GB for media files (home videos and stuff).
Disk Utility asked me for a password. I chose one and saved it in the keychain. After the format, the disk has been mounted. Worked great so I unmounted it.
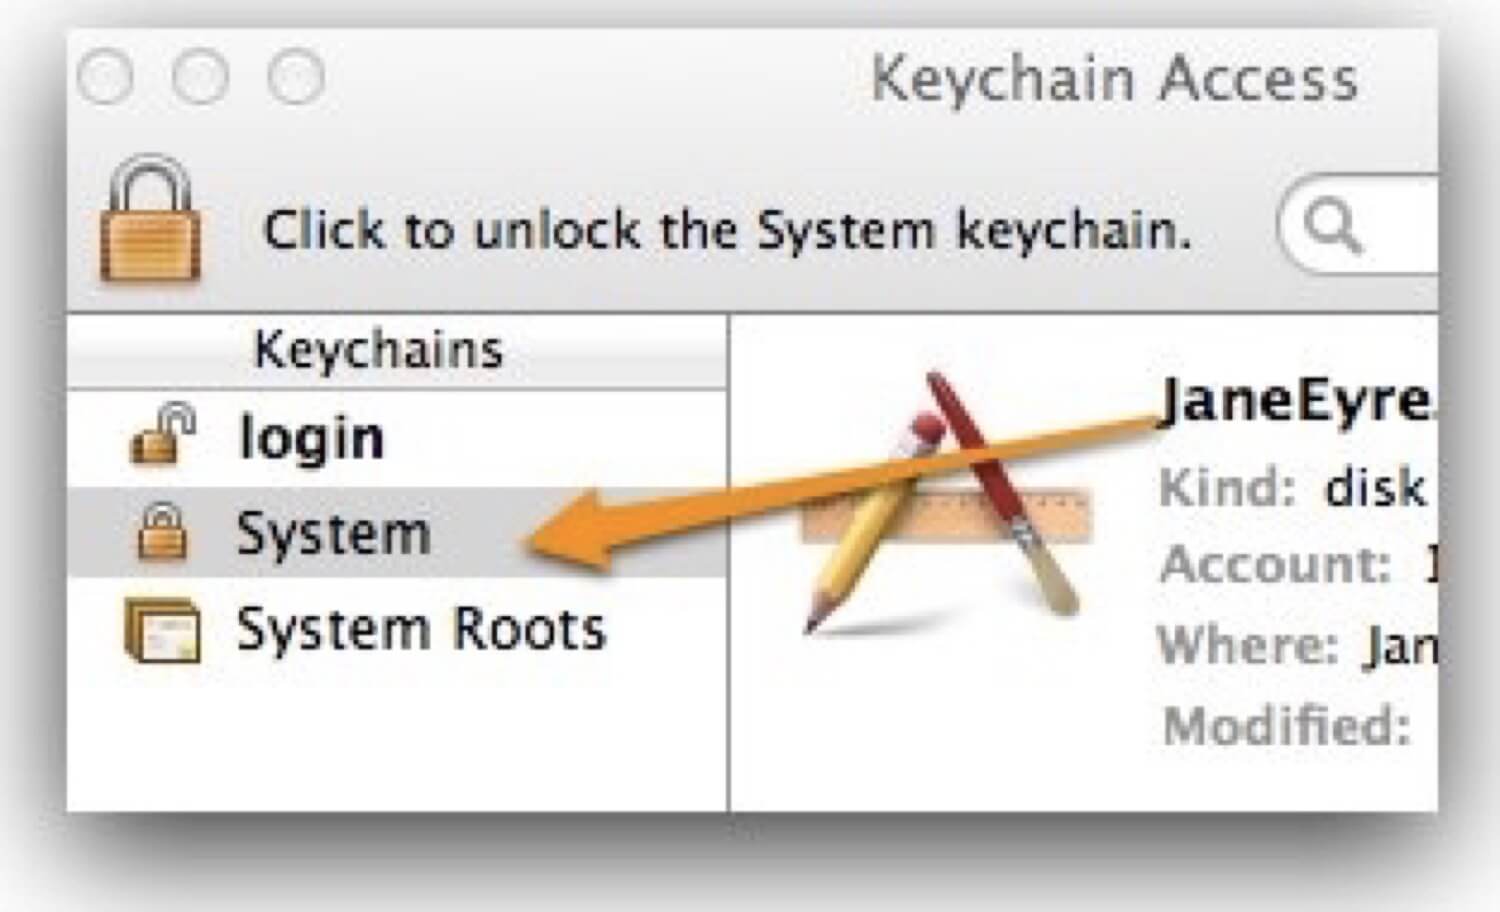
- Open “Keychain Access” application (you’ll need to provide your admin password here) and move the password from your personal keychain (usually called “login”) to the “system” keychain.

Step 3. Do the first backup and you’re set.
When Time Machine asks you to point the drive to backup to, just point to your Time Capsule drive where the encrypted sparsebundle resides. And go with the first backup!
Do your first backup. It will take a while, do it before going to sleep. Now the Time Machine will back up to this “Sparsebundle” encrypted virtual hard disk every time and will not take over your entire Time Capsule disk. The Time Machine will rename your disk to just “ComputerName.sparsebundle” - don’t worry about it. It will find it for backups later.
Optional Step - schedule backups manually.
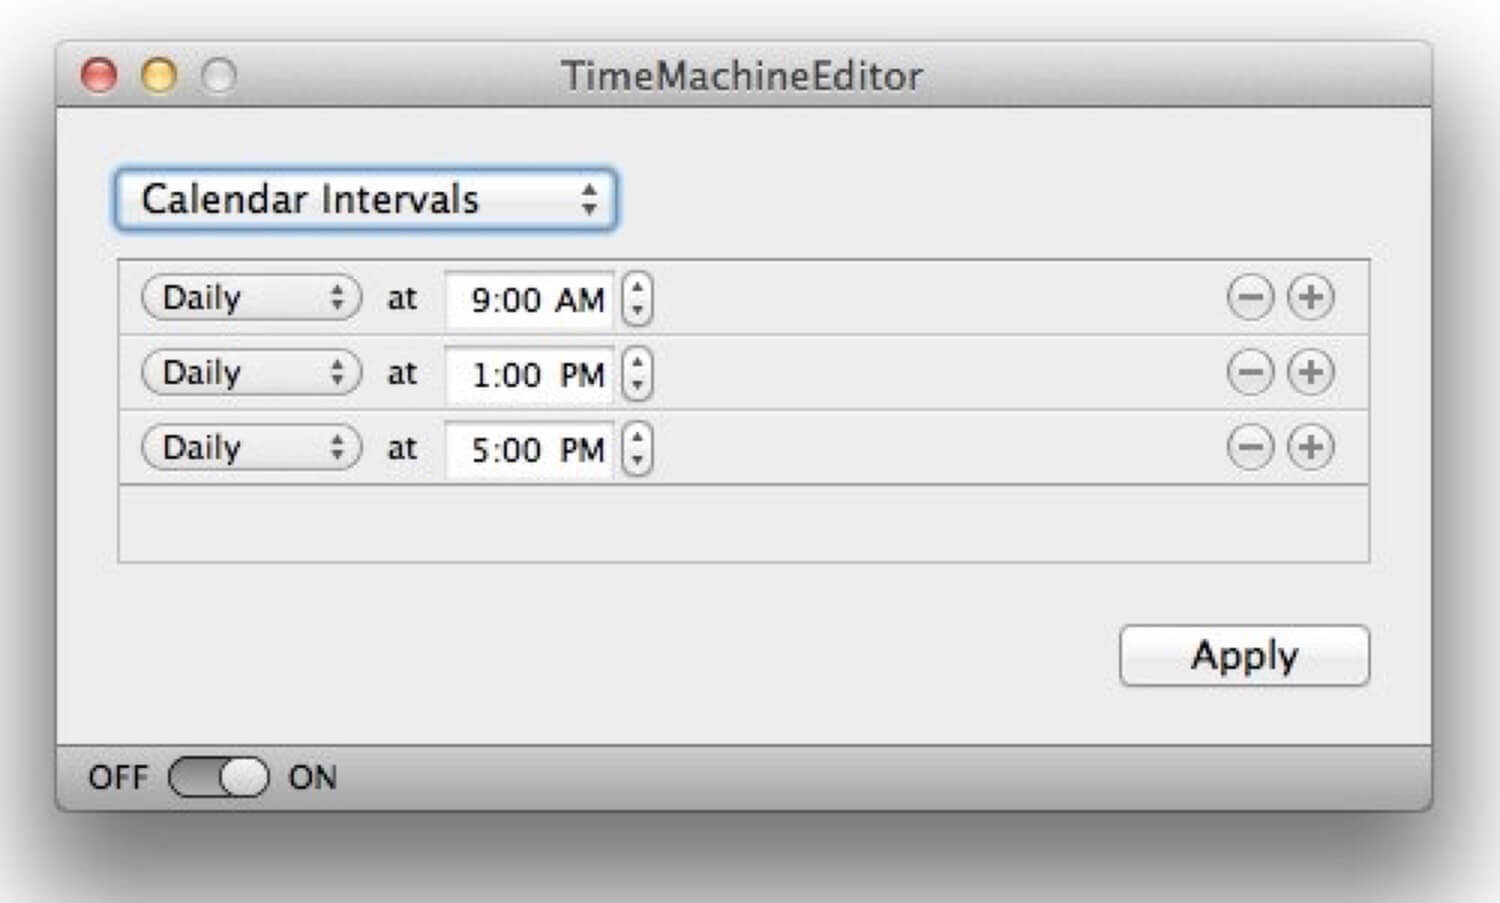
If you’re like me and you don’t like Time Machine backing up every hour, you can do an optional step - download TimeMachineEditor application and schedule your backups. This is how I do it:

TimeMachineEditor will disable your official Time Machine backup scheduler as it triggers backups by itself. My backups are being run 3 times a day and I think it’s more than enough.
Congratulations. You have secure backups on your Time Capsule in Lion and you’re set to be even more productive on your Mac. Good luck!